
About a month back I stumbled across a crochet technique called 'tapestry crochet'. I didn't know much about it so I searched and I searched and I searched - looking for as much info as I could. There were a few YouTube videos and an american website offering some handy info but it all seemed rather complex too me. I persevered, practised my little heart out, and eventually I cracked it. To be honest - I always think crochet patterns look and sound far too complex, more than they actually need to be. So, I've put together a tutorial for a simple 'Tapestry Crochet Washer'.
What I've done here is written my own pattern. I have to be clear about this for obvious copyright reasons - I have not copied this pattern from anywhere. It has been designed by my 7yr old daughter on graph paper (link here) and interpreted into the following tutorial by me.
O.K... Now that the technicalities are out of the way lets get started... :)
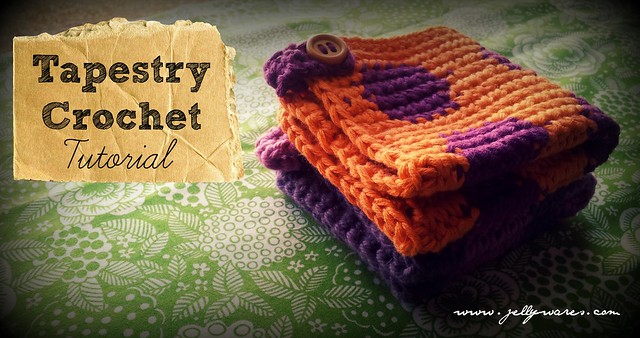
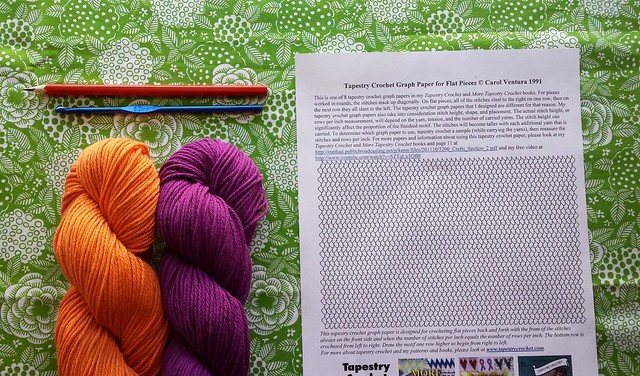
Grab yourself some supplies... I like to use worsted weight cotton for my washers and for this project I'm using Cascade Sierra (80% cotton 20% wool blend). Pick 2 shades that pop together, I've chosen Tangerine(orange) and Mulberry(purple)! You'll need a 5mm hook, a lead pencil, a print out of graph paper (link here), a darning needle and a button.
Let's sketch out a design.
When you crochet flat, turning your work for each row, you'll notice that ridges form in your work. To eliminate this I'll be working my washer back and forth - which means, when I get to the end of the first row (and all odd rows) I'll be swapping hands and working back across my work for the 2nd row (and all even rows) with my left hand. All this is done WITHOUT TURNING my work. This is a little tricky at first but after a few rows it gets easier and you won't feel like your crocheting with your thumbs - I promise...
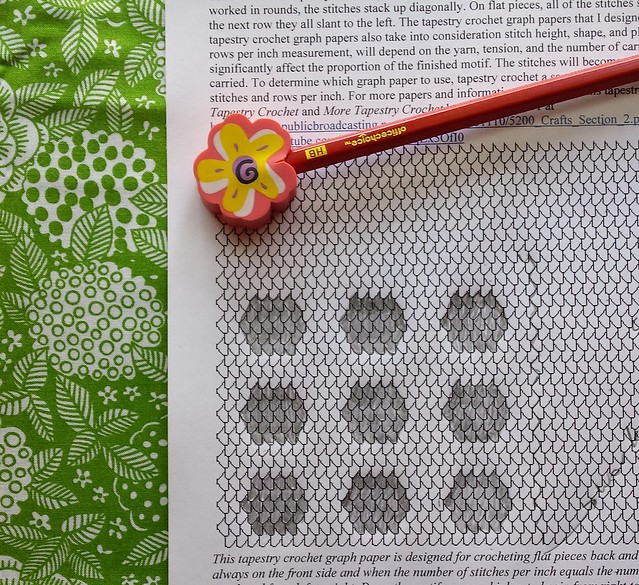
So, you've got your graph paper and a lead pencil, I also like to have an eraser handy because I'm bound to make a mistake. First work out how big you'd like your washer. I've found that 28 stitches makes a decent sized washer by the time you add a border - approx 7 inch square.
Mark a line on your graph paper showing 28 stitches so you can visualise the area you have to create your design. You'll notice that with this graph paper each row is slightly angled - when you crochet your stitches will sit at an angle, this graph paper has been designed with this in mind. If you were to draw your design onto regular graph paper it would turn our slightly different. I have tried using both kinds of graph paper, regular and the one pictured below, and have found that my designs seem clearer when I use this paper (link here)...
I've copied the SPOT pattern that my 7yr old designed for you to use for this tutorial - now it's your turn to copy it onto your own graph paper (link here).
You'll be working your pattern from the bottom up. The first row on the graph paper is worked left to right (you can tell this by the way the stitches are angled). I want my pattern to start on a row that works from right to left so I've started my drawing on the 2nd row...
Note : : I will be working 2 rows of single crochet before I start working my pattern. There is only 1 row pictured before the pattern starts - let's pretend it's actually 2!
I'm going to use orange for the main colour and purple for the spots...
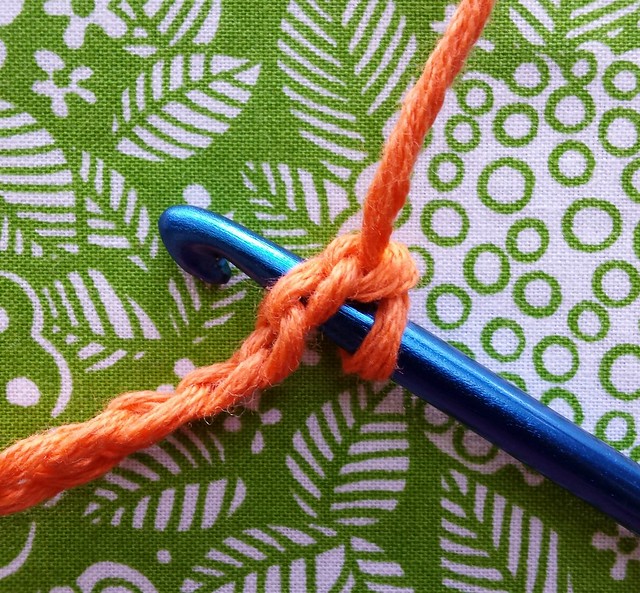
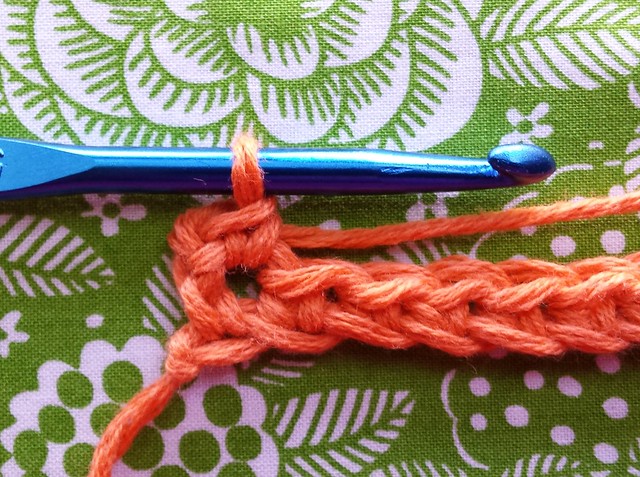
Lets get started!!! I like to use American Crochet Terms and this washer will be worked entirely in single crochet (sc). With your main colour and 5mm hook chain(ch) 29.
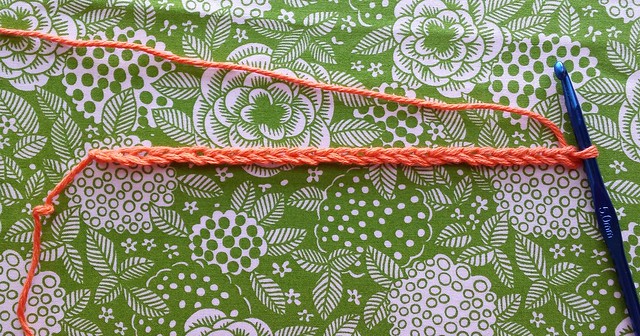
Row 1 - Into the 2nd ch from the hook you will be working 1 sc. Make sure that when you insert your hook into the chain that you are going under 2 strands of yarn like so.
When your first sc is complete it should look something like this. See how there's only 1 strand of yarn at the bottom the the sc? Great! Let's keep going...
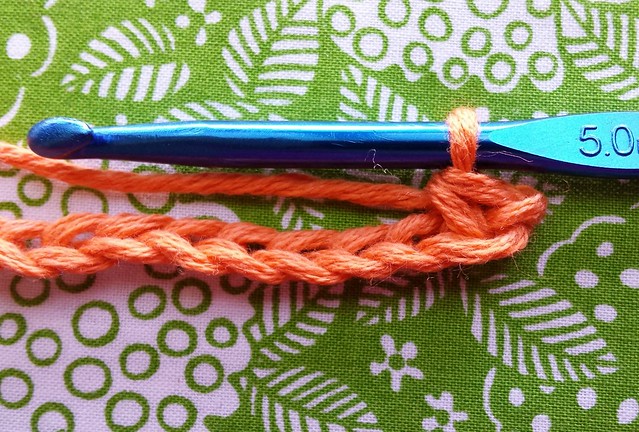
Now you're going to sc into each chain across. You should have 28 single crochet at the end of this row - Row 1 completed.
Row 2 - Take your hook out and insert it into the stitch from the opposite direction like so. You are now going to work row 2 from left to right, without turning your work, with your left hand.
Chain 1 and sc into the top of the last sc worked in Row 1.

You now have something that looks like this...
Work 1 sc in each stitch across, with your left hand, and when you get to the end change your hook around to work the next row as normal, from right to left.
Note : : in the next row we will be introducing our pattern!!
Row 3 - ch1 and sc into the last sc from Row 2. You now need to look at your graph paper and the pattern you copied down. You are up to Row 3 (2nd row from the bottom because we added an imaginary row, remember) and it is worked from right to left so read the pattern that way too...
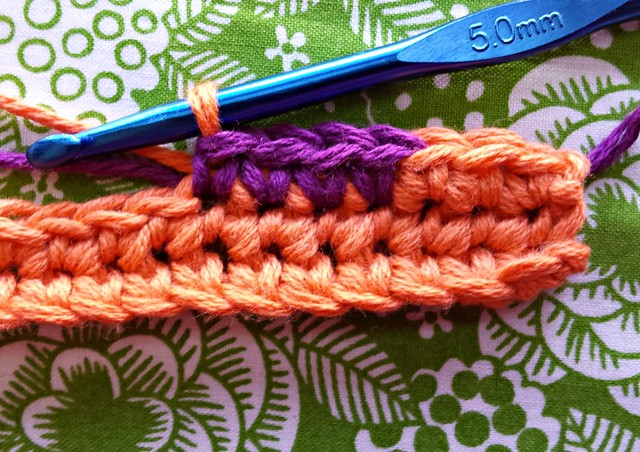
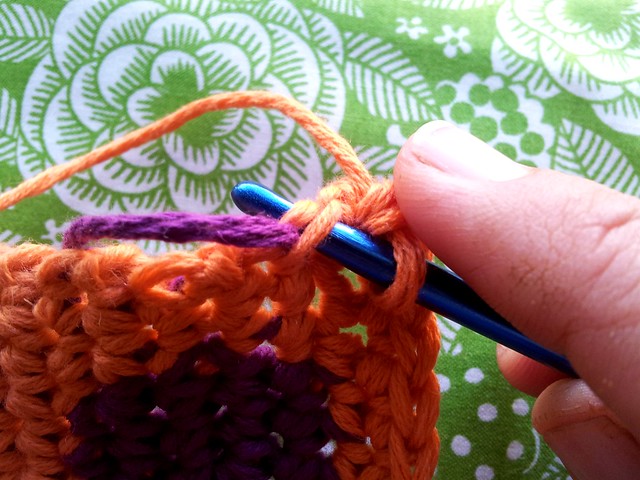
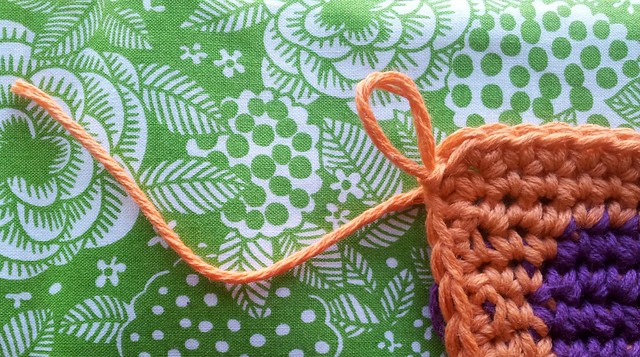
The pattern has 3 sc in the main colour and then changes to purple. Work 2 sc as normal but when you get to the 3rd sc you will need to finish it off by changing colours to set yourself up for the next sc (which is a purple one)...
To change colours simply tie the purple yarn to the orange yarn - pictured below.
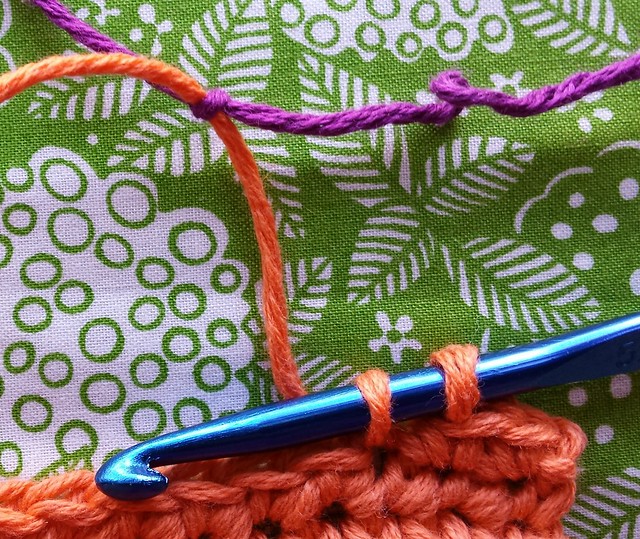
Then pull it up nice and close to the back of your work like so...
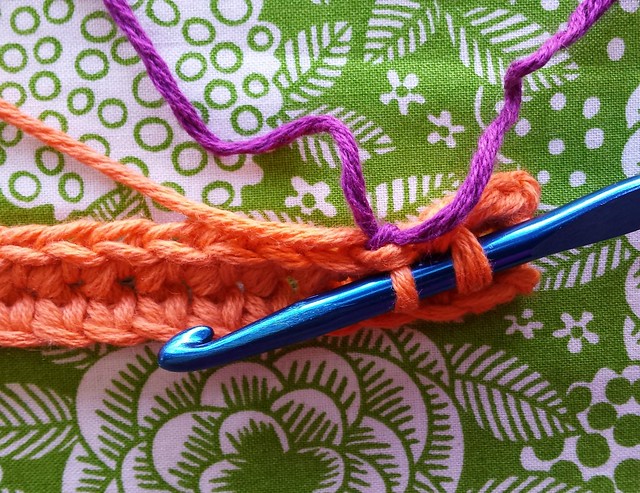
Now finish the 3rd orange sc by yarning over with the purple yarn and drawing through the 2 orange loops on your hook like so... You will now have 3 completed orange sc's and your new colour (purple) will be ready, waiting for you on your hook..
Here's a picture of it from the back. See the know sitting nice and snug up there near the stitch? Perfect!
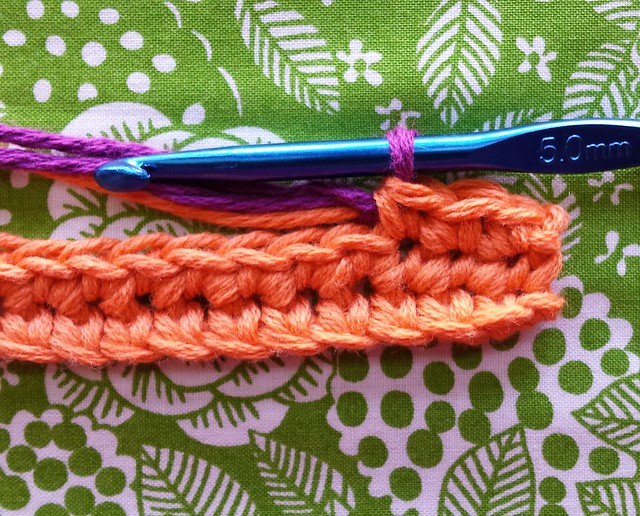
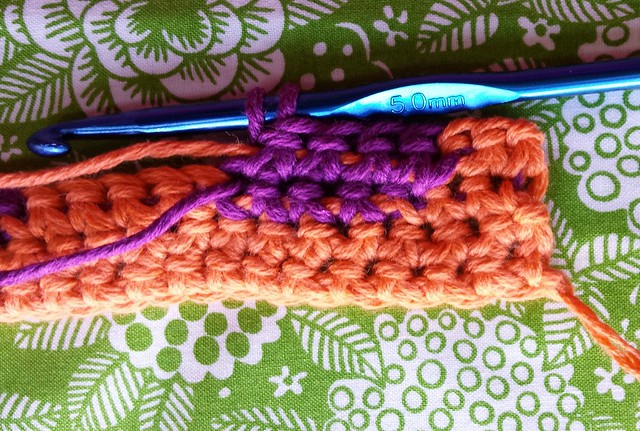
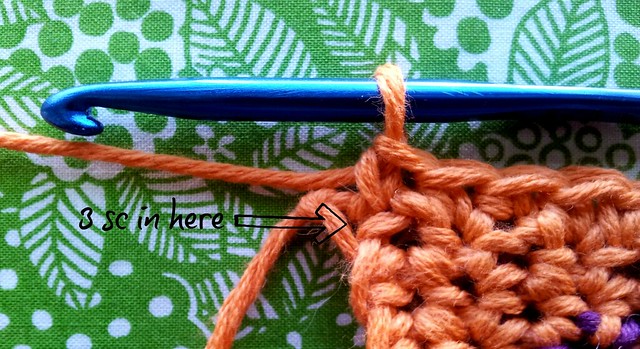
Next up we are going to work the 4 purple sc's for the first row of the pattern. You will be carrying your orange yarn along with you as you go, sandwiching it between the stitches of each sc worked in purple... To do this simply run the orange yarn along the top of the sc's from the previous row while you work the next 4 sc's (in purple).
Remember to yarn over and draw through with the orange yarn on the last sc in purple to change colour. After working your first lot of purple you should have something that looks like this.
Continue on in this way for the remainder of this row, changing yarns as indicated on your pattern and making sure that you yarn over and draw up the next colour yarn on the first and last stitch of every colour change. All the while sandwiching the unused yarn between the working yarn sc's.
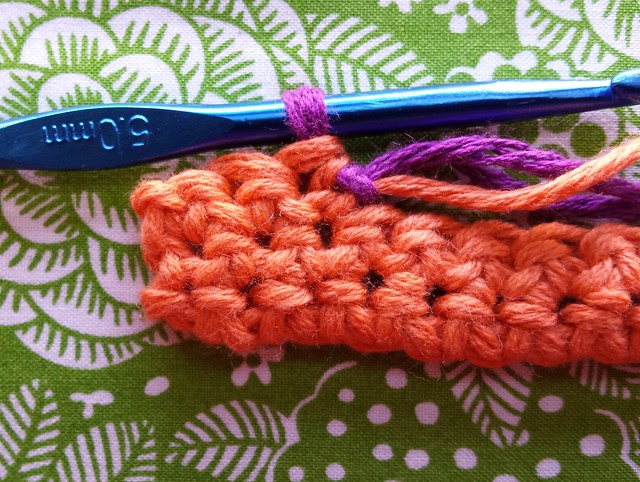
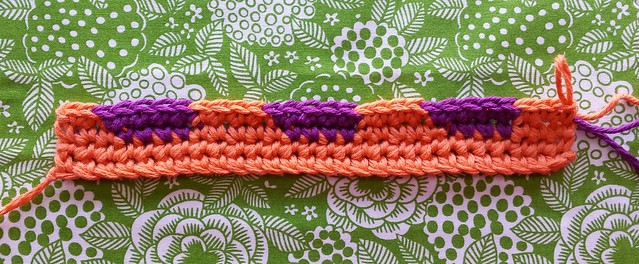
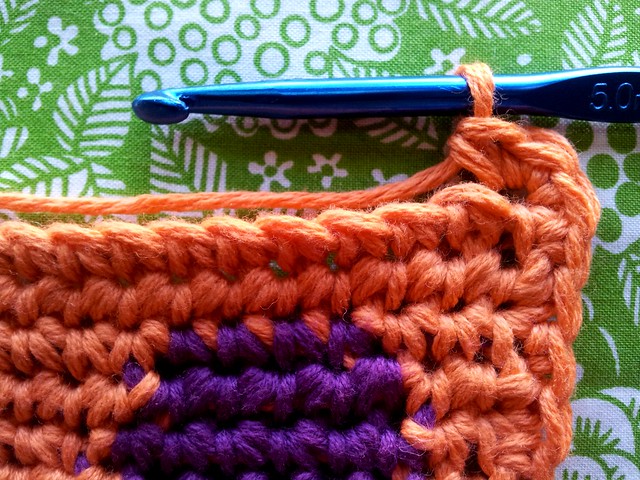
Hopefully your washer will look something like this after row 3.
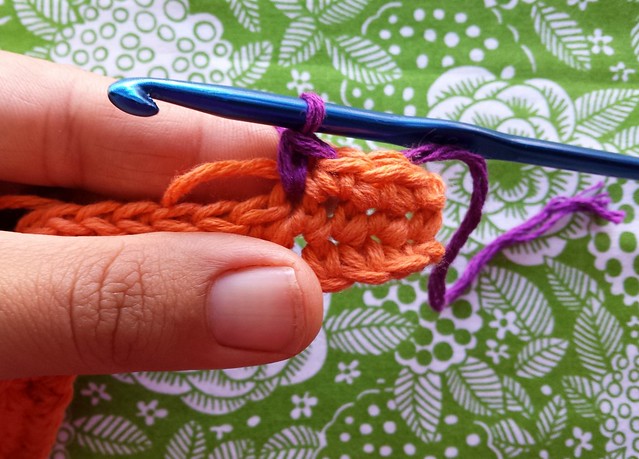
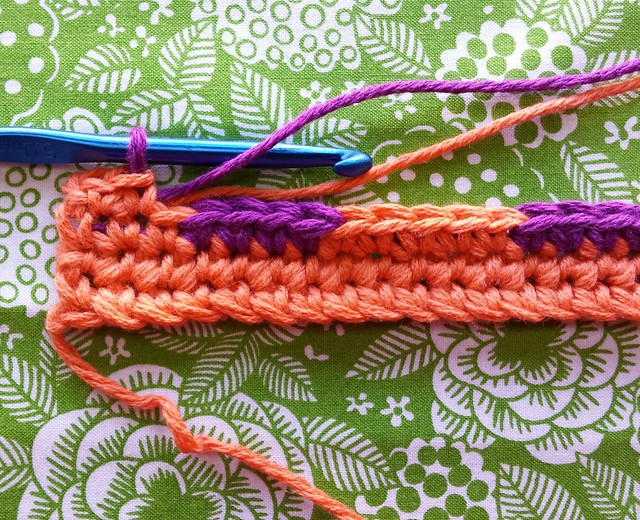
Row 4 - Now it's time to work back with your left hand. Following my pattern I need to work 2 sc in my main colour and then change to purple. So, continue sandwiching that purple yarn between your stitches and ch 1 and sc in the last 2 sc from Row 3 (remember to yo and draw up the purple yarn on the 2nd sc to change colour). Now work 5sc's in purple.
Sometimes on the rows I use my left hand to do I find that the yarn I'm sandwiching between the sc's gets a little loose.
Simply give it a slight pull before changing back to that colour to eliminate this problem.
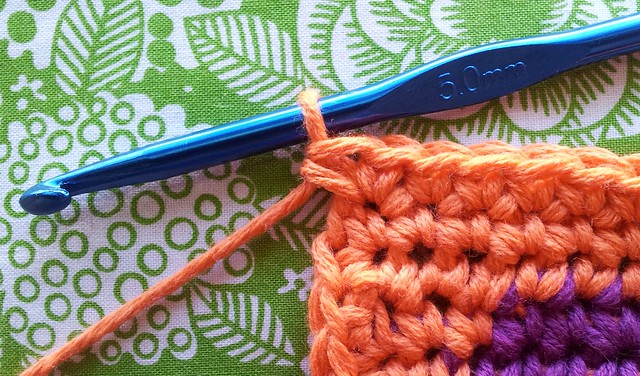
Work the remainder of this row and you should have something that looks like this - right??!!
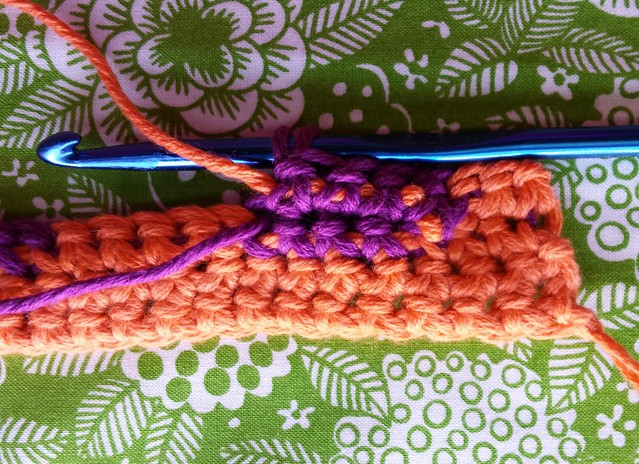
Continue working back and forth, left to right, sandwiching that unused yarn between your sc's as you go, and changing colours by yarning over and drawing up a loop at the start and end of every colour change.
Here's a progress picture after the first group of spots have been completed... Can you see how when I work from right to left my stitches lean to the left and when I work from left to right they lean to the right?? That's why I like to use this graph paper (link here)! It has been designed with this in mind!!
Now that you've kinda got the idea let's keep going!
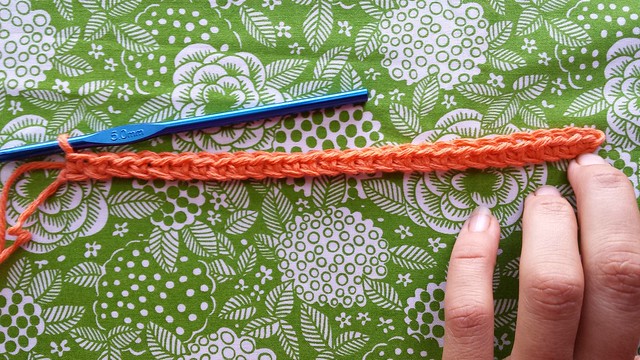
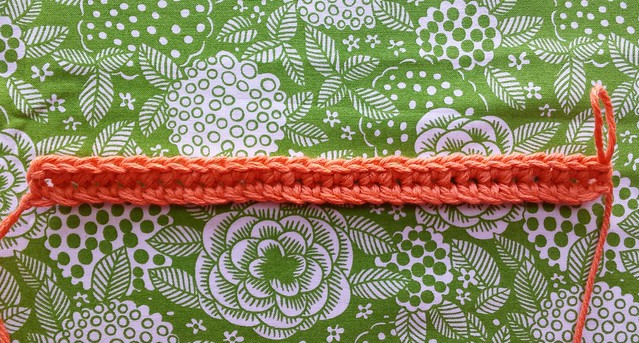
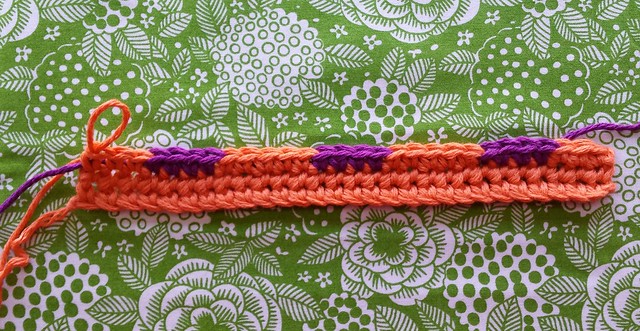
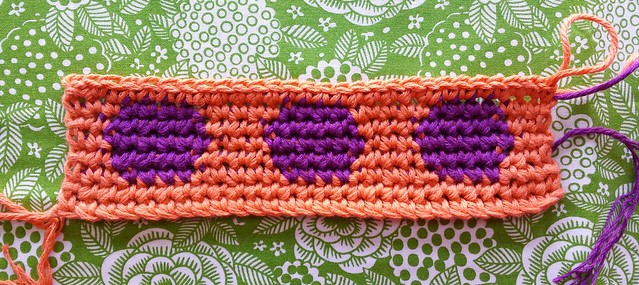
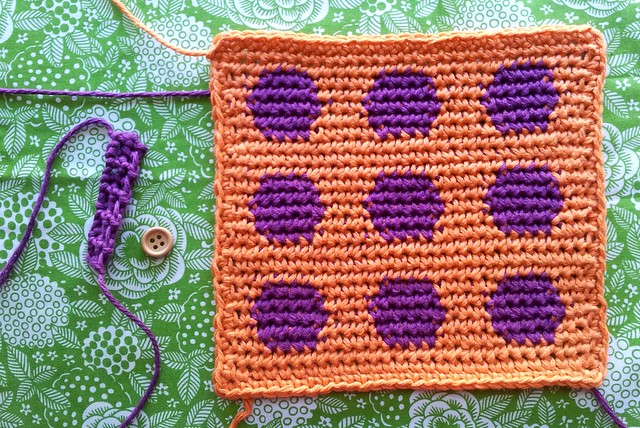
I worked 25 rows before starting a border and it looked like this.

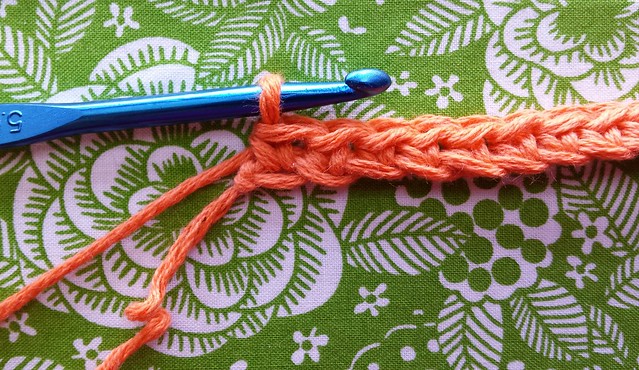
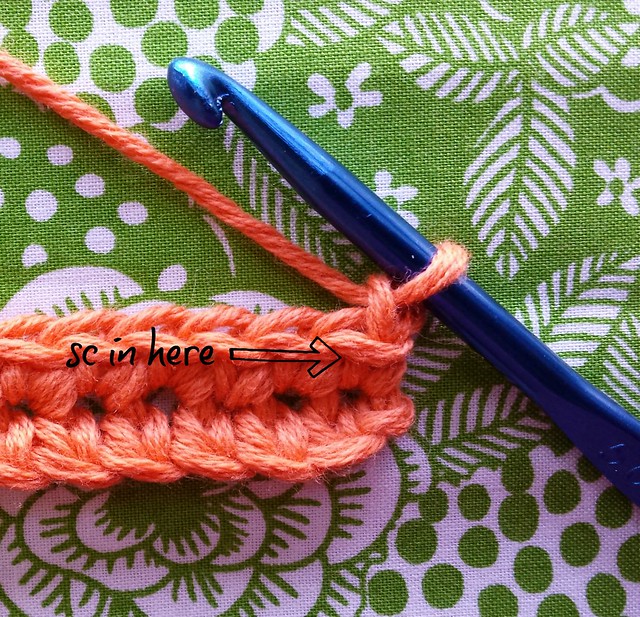
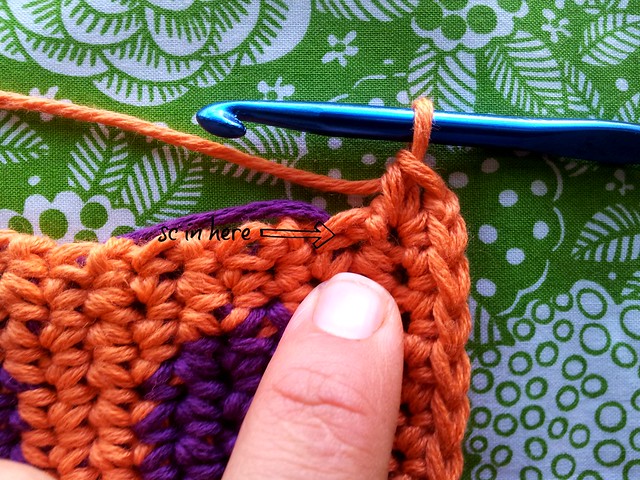
When you finish working the last row of your spot pattern you can cut your purple yarn and work the last 2 rows with just the orange yarn.
Now for the border - the easy part... Ch 1 and sc in the same space as your last sc from your last row. You will now sc in every row down the side of your washer starting here.
You want to make sure you insert your hook through 2 strands of yarn when working sc's down the edges - I just think it makes the finished washer look neater... Sc all the way down this edge.
You now need to sc along the bottom of your washer. To make a corner work 3 sc into the first ch loop.
Like so...
Now sc in each ch loop across. Work 3 sc into the last ch loop for the next corner then sc in each row up the other side.
When you get back up to the top again, work 3 sc into the first sc and 1 sc in each sc across until you get to the last sc. Work 2 sc into the last sc.

Like so....
Now ch 1 and join with a slip stitch to your very first border sc...
And here you have it 1 almost finished washer!!! YIPPEE!!!
Next, I like to add a tab and a button. To make a tab simply ch 3 and sc into the 2nd ch from the hook and the next ch too. 2 sc in total.
Next Row - ch 1, sc in next 2 stitches. Repeat this row a total of 8 times and fasten off.
Sew your tab and button to the top corner of your washer and your all done...
WOW - that was long winded... I hope you made it all the way to the end but most importantly I hope it all made sense and you're sitting there with 1 completed washer. If you're unsure about any of the steps in this tutorial PLEASE comment below and I'll do my darnedest to sort it out for you. Or, if you've taken the time to work through this tutorial, and it all made sense, I'd love to hear from you too...
*** Happy Hooking ***


I'm nearly finished my washer for the swap so I shall give this one a try next. I've always wondered how to crochet the different designs/colours in, and now I know.
ReplyDeleteThis type of washer would be perfect personalised with an initial of the recipient. x
AWESOME Zara!!!!
DeleteYou're right, a personalised version would be a perfect gift... :)
a fantastic tutorial and I will definately be back again to read it all and try my hand at your pattern. I was about to start on my dish clothes and homemade soap production because it is my standard xmas gifts for family and friends.
ReplyDeleteThanks Rochelle!!!
DeleteI too love giving washers and soap for Xmas presents... :)
Oh wow! I've been eyeing off the tapestry cloths for a while and really wasn't sure how to carry the yarn along. Thanks so much for the tutorial, it's fabulous. I'm definitely going to give this a whirl - not so sure I'll be capable of working back with my left hand though, but I'll give it a go :)
ReplyDeleteThe cloth you created with the little people on it is divine, love it so much.
Thanks Mel!!! Try the left hand, if you can crochet it is totally easy after the first few rows - trust me... :)
ReplyDeleteI'd love to hear how you get on once you give it a go..
Thanks for popping by.. :)
Thank you for this tutorial. I have not seen much information in mainstream crochet sites. Have you attempted other techniques as Fair Isle crochet, mosaic etc.? I'm going to follow you!
ReplyDeleteHello, Jodie! I am so happy to have found your nice tutorial and main - how to crochet without truning so that pattern looks tight! Thanks for this tips. I tried to make that popular Kitty Bag.. but my kitties look so horrible, because their shape distorted becaus eof turning. Now, I guess, I'd need to redo the pattern.
ReplyDeleteYour dishwash looks simple and easy to make!
Im the proud owner of this washcloth and I still use it to this day!! Leanne xx
ReplyDelete