Sunday, October 31, 2010

Counting Stripes.....

Miss Connie really does love when it's time to send sheep off to market and we usually find her right here...........Propped up next to the loading ramp, anxiously waiting to 'help' count the sheep onto the truck. 34, 22, 13, 17, 103.... For some reason her numbers just never seem to match Daddy's and for the life of me I don't know why... *wink*....
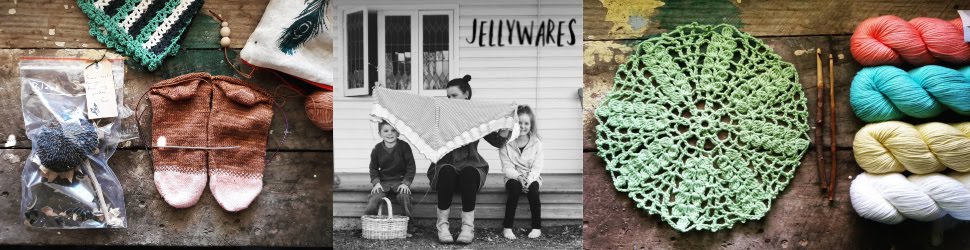
Thanks to the help of my Mum, and her fantastically fast knitting hands, this stripey 'mini-shawl' was finished in less than 24hrs....
It used just under 2x50g balls of Heirloom Alpaca, a 100% Australian product, gotta love that!!!! I can remember when stripes used to scare me, the thought of changing colours not to mention those oodles of dreaded ends to sew in at the end - EEEEKKKKK!!!! That was until I learnt to knit my yarn up as I go along, what a genius idea..... How do you work your stripes???

Tuesday, October 26, 2010

Cotton Runner Kit...

Cascade Luna is an Aran weight Peruvian Cotton and is great to use to add texture to a simple pattern. I currently have 2 'Cotton Runner Kits' to choose from in my shop and they are each available in 3 diferent colours: 711-plum, 738-cream, 755-apple green.
$10 Kit Includes : : 2 x 50g skeins of Cascade Luna and Cotton Runner Pattern.
$12 Kit Includes : : 2 x 50g skeins of Cascade Luna, 4.5mm hook and Cotton Runner Pattern.


Kits are only available at 'Jellywares on Marshall'. If you'd like one posted out, leave a comment and I'll forward you the details.

Sunday, October 24, 2010

Honoured.....

Where on Earth has this past week gone???
It feels as thought I've been running around in circles like a crazy woman hoping that eventually everything will fall into place... Well thankfully after a very long and exhausting day yesterday DH and I hit the hay nice and early at 8pm (yes that's right the sun was still up... sigh). We woke before the sun this morning, loaded our truck full of goats and I sent DH down the highway on an 18hr return trip leaving me and the girls behind to finally get things together...
You see, I was very honoured to be asked by Landmark Russell to cater for their latest clearing sale, to be honest I absolutely jumped at the chance to take 'Jellywares on Marshall' bush.....
So on Friday night I cooked up a storm and we headed to Windera for the day on Saturday to feed a tribe of hungry farmers. We had roast lamb/cheese/relish & egg/lettuce sanga's, Anzac biccies, choc-brownie slice, lolly bags, chips, lots of icy cold drinks, tea & coffee, and of-coarse snags & onions on the BBQ.
My girls were very well looked after too with little Millie going walkabout with a dear old friend and Miss Connie trying her hardest to keep the Landmark office girls on their toes (thanks for your patience Gail, Jodie, Ellie, Jackie, and little Brook-y)...
We had the best time and are very hopeful that the gorgeous Dave and Gail will ask us to do their next sale, whenever it may be.....
On the home front, Little Miss Connie has been rather preoccupied of late playing Mum to a new poddy lamb...
She makes her Mumma so proud, the way she cares so tenderly for her precious little treasure, Jessie, getting her milk just the right temperature and making sure she drinks just enough is just too sweet for words..... *^_^*
So with the house now clean and the washing up to date I set to boiling some water to cook the girls some pasta for dinner. Thoughts of melting vintage knitting needles came to mind (don't ask me how) so I hit the knitting needle stash, found 10 great candidates in a variety of colours and chucked them into the pot....
After about 10 mins, boiling away rapidly, my needles resembled a well cooked string of spaghetti. I bent them around my fingers until something a little like this,
and this,
and this,
and lastly, this was created.....
Man this was fun!!!!!! I am so itching to give some other kind of melted knitted accessory a go now, got any ideas???????

Sunday, October 17, 2010

Dishcloth and a '1st Installment'....

The Spring Washer Swap is done and dusted for yet another year, here's a glimpse at what I created for my lovely partner, Kate... It's a new pattern I've been working on and is now available in my shop as as kit, yarn and all, for $4 (+$1 for postage. If you're interested in 1 just email me or simply pop into Jellywares on Marshall, that's where they'll be..... )

They measure 5' across and are made using a cotton and bamboo fibre crocheted together.... They're the perfect size for washing the dishes and I now have a stack 6 high in use at my house at the kitchen sink, that's how addictive they are..... *^_^*

I'm happy to report that I'm finally finished testing the first on my ruffle dress patterns and it's available in 2 installments for free... If you'd like a copy of the first installment, part 1, just leave me a comment with your email address and I'll forward it on to you...
It's in a size 1-2years and 3-4years..... I would really love to hear any feedback that you have if you get the chance to whip one of these sweet little ruffle dresses up for your special little Miss.....

Friday, October 15, 2010

It's Official!!!!!

Where have I been for the past, oh say, 5 YRS while the rest of the world has been delving into the big wide world of absolutely addictive Japanese crafting????
When I stumbled across this book last weekend I was instantly inspired.... Now having made 3 tops from the book I think it's only fair to say,
I'M TOTALLY HOOKED!!!!!!!!!!!!!!!!!!!!!!!!!!!!!!!! (this top is actually a dress, I've just tucked it into my skirt today for something different...)

The patterns and directions are written in Japanese, ONLY, so I was scared, really scared!!! But the patterns are well laid out and to be truthful I don't really think you need any instructions if you have basic dress-making skills....

So armed with some really cheap fabric I set to work trying my hand at my first Japanese pattern...

WOW!!!! These people really know how to write a pattern. It was so easy, not to mention quick... I made the size medium (measurements are given in cm's and this size suited me the best, apart from the fact the my hips were about 15cm bigger, gasp!!!!) only to find it was WAY TO TIGHT!!! What went wrong???? I'm assuming that I must have forgotten the seam allowances so with take 2 I added ample seam allowance and started again.... This time it was an absolutely perfect fit!!!

Have you ever crafted from a Japanese book before??? Got any good recommendations????

Tuesday, October 12, 2010

Keeping Me Inspired.....

After a long crochet session with this gorgeous lady over the weekend I am now dreaming of the delicious linens that will accompany this burnt orange bodice once it's eventually finished.....
And how lucky am I that my very special friend came with an arm full of gorgeous books for me to peruse for the next week or 2....
I'm loving the Japanese craft one most of all and am so totally starting one of these sweet little Summer tops for myself, ASAP!!!!!
So now it's time to hit the fabric stash in search of the perfect fabric to match.....
Here's hoping you have a chance to be surrounded by people who keep you inspired some time this week too.... :)

Friday, October 8, 2010

Quandong Jam....

This time of year spells the start of Quandong Season.... If you've never eaten a Quandong before they're a cherry sized fruit with a tart, almost bitter, flavour.... They grow wild in the bush out in these parts and I'm lucky enough to have 2 huge trees on 'Darling Downs' Station, and 1 of these is full to the brim with fruit at the moment.....
Here's how I turn these little bite sized treasures into some yum-o jam....
First you need to wash your fruit and then start removing the seed.....
To remove the seed, grab a sharp knife and slice through the flesh like so.... Now squeeze the back of the Quandong and you'll see the seed starting to pop out..... Squeeze a little harder and that baby will pop right on out..... And there you have it a seeded quandong ready for jam making... The beauty about this fruit is that is breaks down really well when cooking so there's no need to chop it up before you start which saves a hell of a lot of time..... Another great thing is that it freeze really well. So if you're short on time when you get all of your fruit seeded just pop them in the freezer until you have the 4 hours spare to make your jam. On to the jam making....
Once you've seeded a full bucket of Quandong's, add them to a large heavy based pot with 5 cups of water and about 1kg of sugar (I like to add a little less than this so that my jam starts rather tart). Bring your mixture to the boil, with the lid on.
Once boiling, reduce the heat and simmer, with the lid off, for 3 1/2 to 4 hours, stirring often and making sure your gooey mixture doesn't stick to the bottom of your pot.

After 3 hours of simmering I like to test the 'set' of the jam. To do this place a small plate in the freezer for approx 5 mins, once it's chilled add a teaspoon of your mixture to the plate and return it to the freezer for a couple of minutes.

Your jam is ready if when you push your pointer finger into the cooled mixture it wrinkles. If you find it hard to understand what I mean in this step I am more than happy to do a picture tutorial on this stage of the jam making process, just let me know in the comments...

If your mixture doesn't wrinkle keep simmering, checking the setting point every 15 mins. Once your jam is ready and has reached 'setting' point, pour it into hot sterilized jars and seal.... A bucket full of Quandongs (about 4kg) makes me 30 x 250ml jars of jam....

Remember all of those seeds that you removed from your fruit, well don't through them away.... They come in handy for loads of fun crafty things like crochet covered jewelery not to mention how awesome they are for playing marbles, my kids just love them!!!

Monday, October 4, 2010

Home Baked Bread....

As the days start to warm up I am frequently reminded of why I love this time of year so much!!!!
The garden is bursting at the seams with new life, little baby lambs dot my paddocks and the festive season count down has begun.... But most of all I love this time of year because of this........
For just over a week, during the cold days of Winter, DH works round the clock planting our crops. We then patiently wait for the days to become longer and the Sun to shine stronger, just so our red dirt paddock's can be transformed into luscious green wheat fields hopefully bringing with it precious income for the farm.....
Yesterday while on the hunt for Quangdong Trees we spotted our first hatching's of locust. Ever so mindful of the devastation these pests can bring we now have another side of mother nature to contend with... So with this weighing heavy on our minds we cross our fingers and hope for the best...
On another 'wheat' related subject, I'd so love to oneday be able to mill my own wheat into flour.... Nothing makes me feel more at home than the smell of freshly baking bread coming from the kitchen...
After my bread machine 'blew-up' just over 10 months ago I've been making bread by hand.... It took a little while to tweak a recipe that was just right for me and my family but now that I have it's a staple with fresh bread baked daily....
Have you ever done it before????? It's so rewarding turning a lump of dough like this.....
Into something as deliciously tasting as this.....
And no word of a lie, if you have a lovely Sunny spot on your bench top you can have oven fresh bread like this in less than 1 1/2 hours.... Believe me, it's true!!!

So if you'd like me to do a little tutorial of how I make my bread just share your interest in my comments and I'll pop it up in a post... :)

Spring Seed Swap?

I had big plans of sharing a late Winter garden update with you all this post, full of beautiful pictures of Wintry produce such as peas (...